I decided it's time I get over whatever has stopped me from canning in the past and give it a try. So today was the big day for me to can applesauce. I have been working on gathering up all my needed supplies over the past few days, including: borrowing my mom's water bath pot, jar grabber device, and funnel. Also purchasing jars/lids and a 22 pound box of organic Dayton apples. I didn't just purchase the apples, I helped the gentleman who owns the orchard pick them off his trees...talk about fresh!
If you are reading this and you can relate and are wanting to give canning a try...applesauce is a simple and great thing to start with! Here is a blog that I followed closely: The Prairie Homestead.
It's best to get all your supplies laid out and ready to go before you start! Here you can see a ladle, funnel, jar gripper, and the rings. There is also a magnetic device you use to pick up the lids out of the hot water but I didn't have that handy little device.
I soaked my apples in water to help wash them off. The organic farm sprays with Kaolin Clay as a natural method of protecting the apples, so they had a white film on them.
If you have cute little people in your home I'm sure they'd be happy to help you rinse them off!
After washing, cut apples into 1/4 sections.
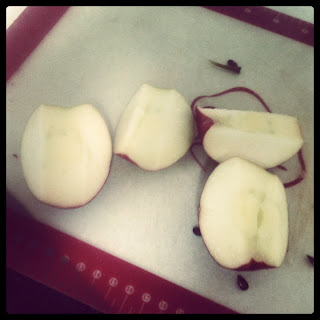
Then lay each section on it's side and cut off the middle part with the seeds. Then cut each section into 2-4 slices depending on your preference. I did not peel my apples.
After slicing each apple I added them to a pot of cold water with 1 tsp vitamin C powder to keep them from browning.
Save all the scraps for your chickens or farm animals if you have them!
Put only a slight amount of water in bottom of pan to keep it from scorching. Turn on medium high heat and let apples soften. Then use a hand blender, food processor, or Vitamix (that is what I used) and blend it up to the consistency you want.
(Forgot to take a picture of this step) Now it's time to boil the applesauce for 20 minutes! Don't start the timer until there is a consistent boil (it won't boil like water of course but it will be splattering). Be careful as it's easy to get burned with hot applesauce. This is also perfect time to turn up the heat on the jars so they can get sanitized!
Pull out your hot jars with the gripper device and set on a towel, use the funnel and ladle to add applesauce to each jar. Take a wet towel and wipe the edges of the jar top. Follow this by adding the lids from the simmering pot and then hand tighten the rings on. Use the gripper to put hot jars back in the water. Make sure they are fully submerged in water, add the lid, bring to a boil and let boil for 20 minutes.
After timer goes off, turn off the heat, take off the lid and let the jars sit in the water for another 5 minutes. Then pull out with the jar gripper and set on a towel. 22 pounds of apples made 8 quarts of applesauce.
Lastly, tidy up the kitchen as it will look like a bomb went off afterwards! LOL and feed those scraps to your animals!
You most likely will make a few mistakes your first time around...just try to follow each step and do your very best. Hmmm what shall I can next?


Great photos Andrea! You did great for your first time canning on your own. You learn soo much doing stuff on your own vs having someone with you. It's a completely different experience. Who knows, maybe by this time next year you'll want to learn to can tuna? I don't think I'd have wanted to learn to can tuna during my first year of canning, but this year was season 2 for me canning, so the idea of canning tuna was thrilling, and it was.
ReplyDeleteI'm wanting to make pickles and spaghetti sauce still this year and maybe salsa.